Magnifying the content
If you are, as the author of this blog, in “serious” years, then you probably sometimes need close-up glasses because you can’t read those small letters on the product declarations. The same thing can happen with documents on the screen. Fortunately, all MS Office applications have a zoom option. In the text that follows, you will learn how to use it, and you will be able to see a few more nifty tricks for dealing with “small letters”.
![]() First of all, how do you zoom the text? In the lower right corner of the Excel window, there is a slider whose swipe to the right increases the size of content displayed on the screen, and swipe left to decrease it. To the right of the slider is a label showing the degree of magnification. Default value is 100%. If you reduce the text e.g. for 20% here will be 80%, and if you increase it by the same amount you will see the value 120%. You can also zoom in and out content of the screen using the scroll key on your mouse while, at the same time, you press CTRL key on your keyboard. Try it …
First of all, how do you zoom the text? In the lower right corner of the Excel window, there is a slider whose swipe to the right increases the size of content displayed on the screen, and swipe left to decrease it. To the right of the slider is a label showing the degree of magnification. Default value is 100%. If you reduce the text e.g. for 20% here will be 80%, and if you increase it by the same amount you will see the value 120%. You can also zoom in and out content of the screen using the scroll key on your mouse while, at the same time, you press CTRL key on your keyboard. Try it …
When you use the Data Validation option, names of the elements in the list have system-defined font size and this cannot be changed. If you need larger labels there is a trick on how to achieve this. First, reduce the font size in the worksheet. It is best to select all values (CTRL + A), and then go to the Home ribbon and click on the icon to reduce the font until you reach e.g. up to 80% impairment. Then zoom in content of the screen by 20%. Finally, you re-enlarge the fonts that you previously reduced to the desired size. If you try to open the drop-down list, you will see that its elements are larger.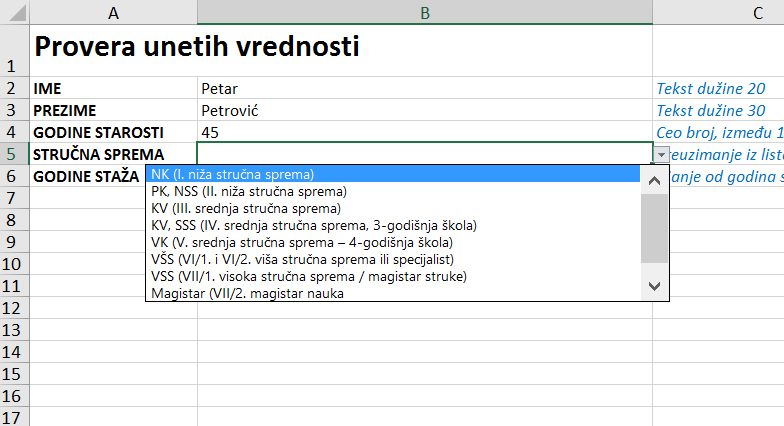
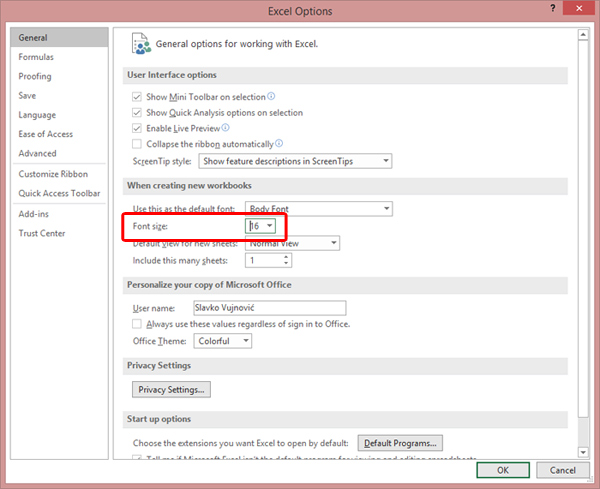
If you are giving a presentation, you may need to increase the size of a formula shown within Formula Bar. To solve this you should increase defaut font size in Excel. Open File/Options and set a new (larger) font size. After you open a new documents everything will be larger and a Formula Bar too.