
Printing a document
If we want to print a large table, it will take up several pages of reports that we have sent to the printer. On that occasion, the table header appears only on the first page. The following text will show the technique used to adjust the layout of the report so that the header is repeated on all pages. Also, we will mention several more useful techniques for preparing for printing regarding quality and the presentation of certain elements of the report.
We can find the print settings options in the Page Layout ribbon, and they are activated by clicking on the button in the lower right corner of the Page Setup group of options. After this action opens the Page Setup dialog box, select Sheet tab, to show options to adjust the printing of the worksheet.
 At the top of the window, there is a Print Area box. In this field, we can manually or by selection select the range of cells we want to print. If the field is empty, it is assumed that we print everything on the worksheet. Below this box, there is a group of Print Titles options that are used to adjust the header of the table when printing. It has two fields: Rows to repeat at the top and Columns to repeat at left. Here you should enter data ranges that represent rows/columns, and there are two fields accordingly where the header of the table is located. Rows or columns we have assigned will be repeated as a header of each printed page.
Then follows a group of options for additional printing setup. Here, we choose whether we want to print the Gridlines, to print document as Black and White document, to save the toner (Draft Quality) or print Row and Column headings. Also, you can set the way to print comments (Comments) or how to print errors in the worksheet (Cell errors as). Finally, at the bottom of the window, we can also choose the order of printing worksheets. This option can be important when printing large tables.
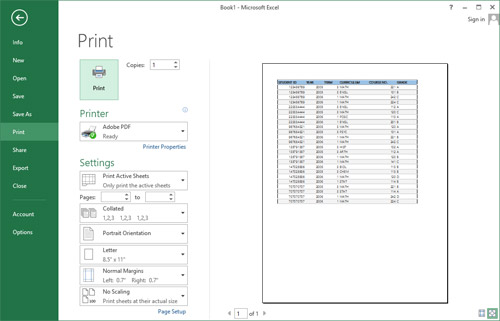 At the bottom of the dialog window there are three important buttons: Print, Print Preview, and Options. The first and second options move the user to the Print Preview menu, where it is possible to view the final appearance of the document before printing and then, if everything is OK, print the document. The last option gives you direct access to printer setup options. For some printers, for example, here you can set whether you are doing two-sided printing, which is the order of the press, whether we print in color, etc. The print shortcut is a combination of the CTRL + P keys, which directly positions us to the print menu.