Date Picker in slicers
Slicers are graphical objects that we can use to filter data on a Power BI report page. When we use the dates to create slicers, then we create the so-called Timeline slicer. Until now, we were able to manually select a date range to filter the data in the report, and recently it is possible to run a Date Picker control in order to chose a date within a slicer.
To use the Date Picker, you’ll need to install the June Power BI Desktop update. Then go to Options & Settings / Options, go to the Preview features menu and select the last option, at the bottom of the window, to enable this functionality.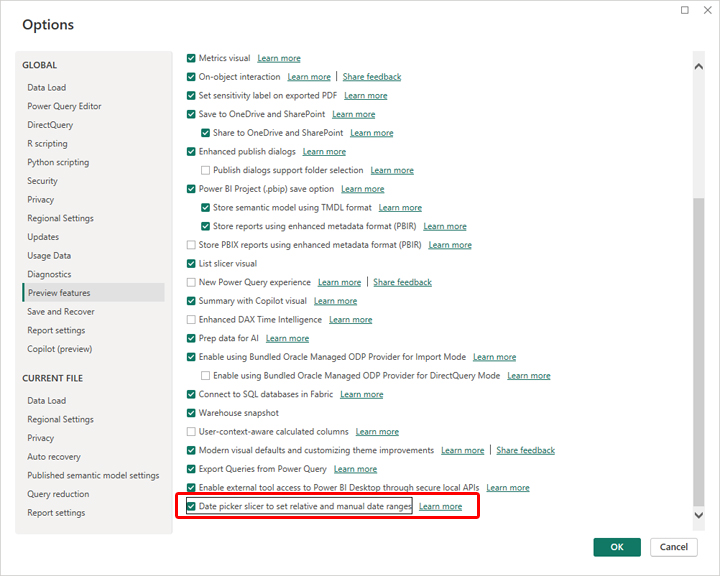
After this procedure, you need to restart Power BI Desktop.
Let’s create a simple report by adding a Clustered Column Chart, where we display the value of sales in relation to classification. We’re going to add the DATE dimension as a slicer. If you now enter to its formatting menu, Slicer Settings/Options section, in the Style drop-down list, you will be able to select the Date Picker option to display the date selection control.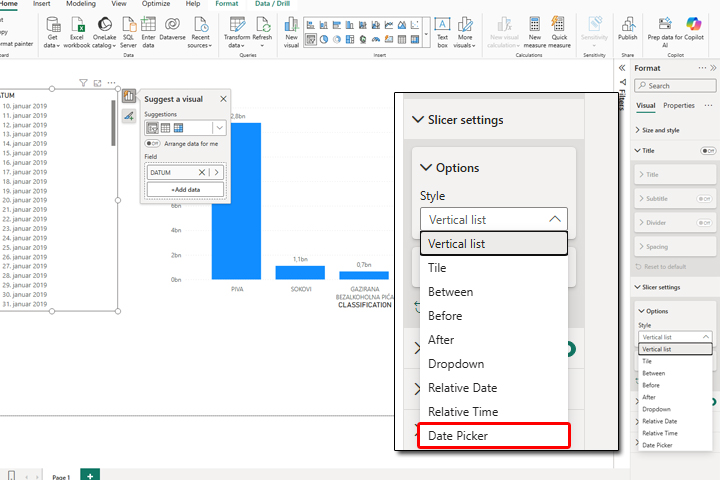
After you select this display method, the slicer will be displayed as a traditional Timeline, but if you click on the icon that resembles a calendar, a date selection control will open, with which you can specify the start and end dates based on which the data in the report is filtered.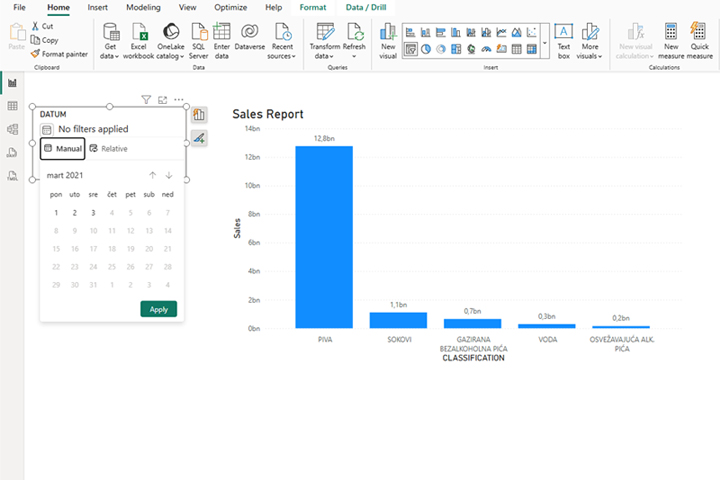
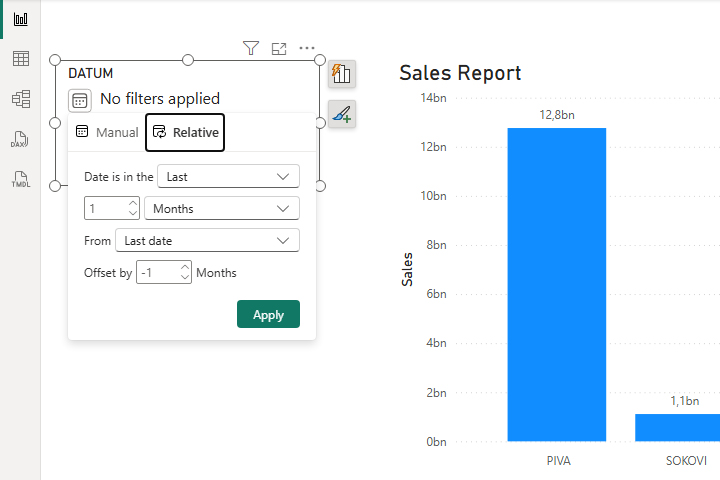
Within the Date Picker control, you will see two tabs. Manual is a tab that displays the days of the month, where you can choose the start date yourself. The Relative tab allows you to select a date range…